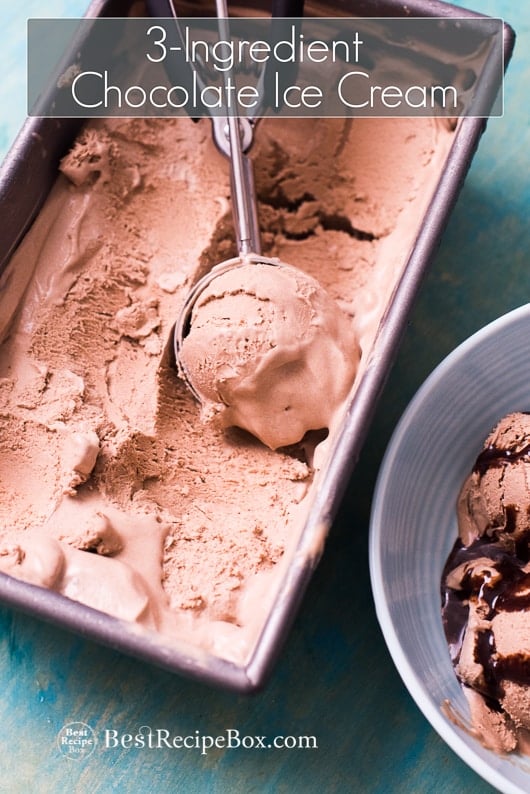
Whip Up Wonder: Your Guide to Easy 3-Ingredient No-Churn Chocolate Ice Cream
Imagine a scoop of intensely rich, luxuriously creamy chocolate ice cream melting on your tongue – and now imagine making it yourself, without an ice cream maker, complicated egg tempering, or a lengthy ingredient list. Sounds like a dream, right? Well, it's about to become your delicious reality! This guide will walk you through crafting the ultimate easy 3-ingredient no-churn chocolate ice cream, a dessert so simple and satisfying, it’ll quickly become your go-to treat. Forget the fuss and embrace the sheer delight of homemade goodness; all you need are three humble ingredients and a freezer.
No-churn ice cream has revolutionized home dessert making, stripping away the need for specialized equipment and lengthy preparations. It’s perfect for beginner cooks, busy parents, or anyone with a sudden craving for something truly decadent. Each bite of this chocolate ice cream offers a deep, dark, and wonderfully smooth experience, proving that sometimes, the simplest recipes yield the most extraordinary results.
The Magic Behind 3-Ingredient No-Churn Chocolate Ice Cream
At the heart of any exceptional ice cream is its texture and flavor, and the no-churn method achieves both with surprising elegance. The "magic" lies in a clever combination of ingredients that, when brought together, mimic the churned consistency of traditional ice cream without the need for an appliance.
The three star ingredients are:
1. **Heavy Cream:** This is the foundation of our creamy texture. When whipped, heavy cream transforms into a light, airy base that introduces essential air into the mixture, preventing it from becoming a solid block of ice. The higher fat content in heavy cream is crucial here, as it helps trap air bubbles and provides that desirable smooth mouthfeel.
2. **Sweetened Condensed Milk:** This ingredient serves multiple vital roles. Firstly, it provides all the necessary sweetness, eliminating the need for granulated sugar. Secondly, and perhaps most importantly for no-churn success, its high sugar content and viscosity help prevent large ice crystals from forming during freezing. This is key to achieving that wonderfully smooth, scoopable consistency that’s characteristic of good chocolate ice cream. It also adds a depth of flavor and richness that complements the chocolate beautifully.
3. **Cocoa Powder:** The undisputed flavor champion! This is where the magic of chocolate truly comes alive. The right cocoa powder provides that deep, satisfying chocolatey goodness that makes this ice cream irresistible. We'll delve into choosing the best type shortly, as it makes a significant difference in the final product.
Together, these ingredients create a stable, airy, and sweet base that freezes into a dreamily smooth chocolate ice cream. There's no cooking involved, no raw eggs to worry about, just pure, unadulterated dessert bliss waiting to be made.
Unlocking Deep Chocolate Flavor: The Cocoa Powder Secret
While all three ingredients are essential, the type of cocoa powder you choose will *profoundly* impact the depth, richness, and overall character of your homemade chocolate ice cream. Not all cocoa powders are created equal, and understanding the nuances can elevate your dessert from good to truly extraordinary.
There are two primary types of unsweetened cocoa powder you'll typically find:
* **Natural Cocoa Powder:** This is the most common variety in many American grocery stores. It's lighter in color and carries a slightly acidic, fruity flavor due to its unprocessed nature. While excellent for baking recipes that rely on baking soda for leavening, in ice cream, its inherent acidity can sometimes result in a taste that feels a little sharp or even dry.
* **Dutch-Process Cocoa Powder (Alkalized Cocoa):** This variety is treated with an alkaline solution to neutralize its acidity. This process darkens its color significantly and develops a smoother, more mellow flavor profile that highlights the rich, earthy notes of chocolate without any bitterness. Dutch-process cocoa is a favorite in European-style desserts for a reason – it blends seamlessly into creamy bases, delivering a profound chocolate experience.
Beyond these, you might also encounter **Black Cocoa Powder**. This is an ultra-dutched variety, boasting an intensely dark, almost black color and a distinctive flavor reminiscent of Oreo cookies. While its intensity might be overwhelming on its own, when balanced with the sweetness of condensed milk and the richness of whipped cream in a no-churn recipe, it creates a dramatic, dark chocolate ice cream with an incredibly luxurious, almost fudge-like depth.
For this easy 3-ingredient no-churn chocolate ice cream, **Dutch-process or black cocoa powder are your absolute best bets.** Their deep color and smooth, bold taste pair perfectly with the creamy base, ensuring you get that luscious, fudgy chocolate flavor that truly satisfies. Opting for a higher quality cocoa powder within these categories will also make a noticeable difference. To delve deeper into the fascinating world of cocoa and make the perfect choice for your fudgy creations, explore our detailed comparison:
Dutch-Process vs. Natural: Choosing Cocoa for Fudgy Chocolate Ice Cream.
Essential Tips for Your Perfect No-Churn Chocolate Ice Cream
Achieving that perfect, scoopable, and intensely flavored chocolate ice cream is easy, but a few expert tips can ensure your success every time. These simple tricks will make a significant difference in the final texture and enjoyment of your homemade treat.
* **Chill Your Tools:** For the fastest and most stable whipping, use *very cold* heavy cream. Take it directly from the refrigerator when you're ready to use it. Going a step further, chill your mixing bowl (preferably a metal one) and beaters in the freezer for 10-15 minutes before you start. Cold equipment helps the cream whip up faster and hold its stiff peaks more effectively, contributing to a light, airy chocolate ice cream.
* **Sift Your Cocoa Powder:** Cocoa powder has a notorious tendency to clump. If you add it unsifted directly to the condensed milk, those lumps can be challenging to dissolve fully, leading to an unevenly flavored or gritty base. A quick sift through a fine-mesh sieve will ensure a smooth, uniform chocolate mixture that blends beautifully.
* **Don't Over-Whip the Cream:** While you want stiff peaks, be mindful not to over-whip your heavy cream. Over-whipped cream can quickly turn grainy or even separate into butter, leading to a denser, less airy ice cream. Watch for firm peaks that hold their shape but are still smooth and creamy.
* **Fold Gently:** Once your cream is whipped to perfection, it's crucial to maintain its airy volume. When incorporating the sweetened condensed milk and sifted cocoa mixture, use a spatula and fold gently from the bottom up. Avoid vigorous mixing or using a high-speed mixer at this stage, as this can deflate the whipped cream, resulting in a heavier, less delicate chocolate ice cream.
* **Choose the Right Freezing Container:** A shallow container is your best friend for freezing. A metal loaf pan or a shallow baking dish allows the ice cream to freeze more quickly and evenly, reducing the formation of large ice crystals. This leads to a smoother, more consistent texture throughout.
* **Cover It Well:** To prevent freezer burn and the absorption of freezer odors, cover the surface of your chocolate ice cream directly with plastic wrap or parchment paper. Press it down so it touches the ice cream completely, then cover the entire container with a lid or another layer of wrap.
* **Patience is a Virtue:** While the promise is "easy," patience during freezing is key. Allow at least 6-8 hours for your ice cream to set completely, or preferably overnight, for the best texture. If it's too hard, let it sit out on the counter for 5-10 minutes before scooping.
For an even deeper dive into achieving that perfect, ultra-creamy consistency and exploring more advanced tips for your homemade chocolate ice cream, check out our guide:
Secrets to Ultra-Creamy No-Churn Chocolate Ice Cream: Expert Tips.
Step-by-Step: Crafting Your Easy Chocolate Dream
Ready to bring this dreamy chocolate ice cream to life? Here’s a simple outline of the process:
1. **Prepare Your Chocolate Base:** In a medium bowl, combine the sweetened condensed milk and your sifted Dutch-process or black cocoa powder. Whisk gently until completely smooth and free of any lumps. This will be your rich, chocolatey foundation.
2. **Whip the Cream:** In your chilled mixing bowl with chilled beaters, whip the cold heavy cream on medium-high speed until stiff peaks form. The cream should be airy and hold its shape. Be careful not to over-whip.
3. **Combine and Fold:** Pour the chocolate-condensed milk mixture into the whipped cream. Using a spatula, gently fold the two together. Start by scooping from the bottom of the bowl and folding it over the top, rotating the bowl as you go. Continue until no streaks of white cream remain, ensuring the mixture is homogenous but still light and airy.
4. **Freeze:** Transfer the mixture into your chosen shallow freezer-safe container. Smooth the top with your spatula. Cover the surface directly with plastic wrap or parchment paper, then cover the container. Place it in the freezer for a minimum of 6-8 hours, or ideally overnight, until firm.
Once frozen, scoop and enjoy your magnificent homemade no-churn chocolate ice cream! It's fantastic on its own, but you can also elevate it with a sprinkle of sea salt, a drizzle of chocolate sauce, a handful of mini chocolate chips, or even a dollop of fresh whipped cream.
Conclusion: Your Easiest Path to Irresistible Chocolate Ice Cream
There’s a profound satisfaction that comes from creating something truly delicious from scratch, and this easy 3-ingredient no-churn chocolate ice cream delivers that feeling in spades. It’s a testament to how simple ingredients, when combined with a little know-how, can yield a dessert that rivals any store-bought alternative. No special equipment, no culinary degrees – just pure, unadulterated chocolatey joy waiting to be discovered in your own kitchen.
So, next time that craving for rich, creamy chocolate ice cream strikes, bypass the grocery store freezer aisle. Grab your three ingredients, follow these simple steps and tips, and prepare to delight your taste buds with a homemade masterpiece. Enjoy the process, savor every scoop, and share the magic of easy no-churn chocolate ice cream with loved ones. It's truly a dessert experience that everyone can master and enjoy!